With the Labour Day long weekend coming up, I want to share some of my favourite long weekend backpacking trips! There’s lot of single night hikes in Southwestern BC, but long weekends are the best for backcountry hiking because the extra day enables you to explore further and to really escape from the hustle and bustle of the city. Whether you’re a first timer or a seasoned hiker, here’s 5 of my favourite backpacking trips near Vancouver:
For the Beginner: Lindeman Lake
Trail profile: Day 1 (2km, 300m gain), Day 2 (8km, 200m gain), Day 3 (2km, 200m loss)
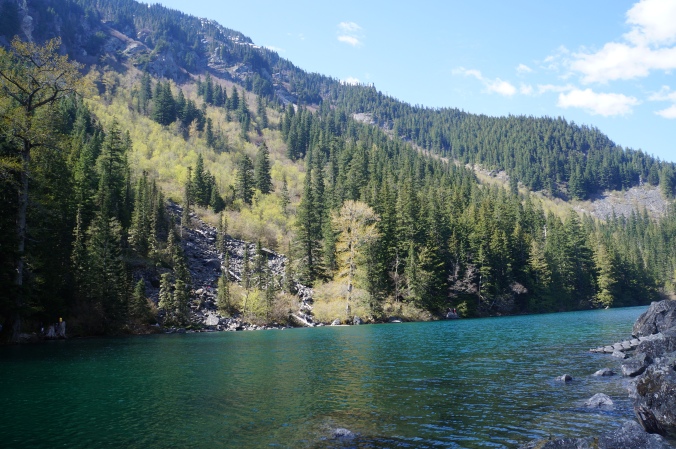
Lindeman Lake is the perfect backpacking trip for beginners and one of my personal favourites for long weekend trips. I’ve been to Lindeman Lake twice for the May 24th long weekend and what makes it so great for beginners is that the campsite is only 2km from the parking lot, so it’s a great way to test out carrying a heavy pack for the first time. Once you set up camp, there are all kinds of options for what to explore over the rest of the weekend.
I wrote a post summarizing the different trails, but my recommendation for newbies would be to hike up to the campsite on Day 1 and then do a day hike to Greendrop Lake on Day 2. Greendrop Lake is approximately 8km roundtrip from Lindeman Lake, so it makes for a good day hike. Then on Day 3 you can hike back down to the parking lot and drive home. Lindeman Lake is located in Chilliwack Provincial Park, so you will need a backcountry permit, but there’s no reservation system and it’s only $5 per night, per person. Please remember that no campfires are permitted in this park at any time of year.
For the Bucket List Hiker: Garibaldi Lake
Trail profile: Garibaldi Lake Trail (18km, 820m gain), Panorama Ridge (15km, 610m gain), Black Tusk (11km, 820m gain), Mt. Price (11km, 620m gain)
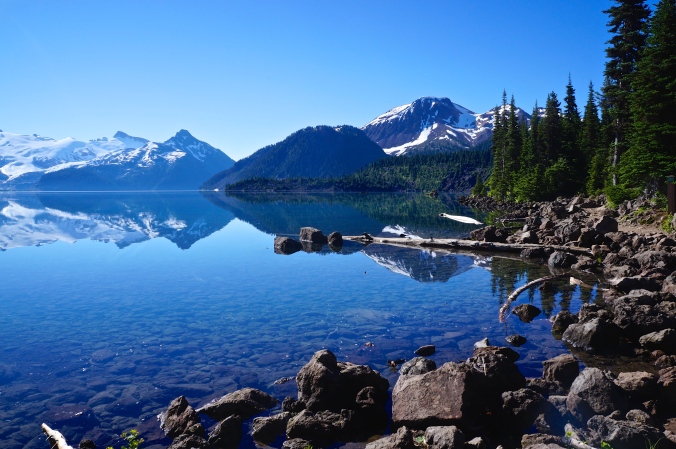
I know, this hike is insanely popular and busy, but it’s popular for a reason! Garibaldi Park is only an hour and a half drive out of Vancouver and it boasts some of the most amazing views of the backcountry. I’ve only been in BC for 5 years and I’ve already done this iconic hike 3 times! There’s a lot to love about Garibaldi Lake, from the beautiful blue hues of the lake, to the breathtaking views of the glaciers and surrounding mountains, to swimming in the ice-cold lake and watching the sunset paint the mountains pink. But my favourite part of Garibaldi Lake is using it as a base from which to explore some of the surrounding trails. While Garibaldi Lake is gorgeous, the trail to the lake itself is a snooze-fest. It’s 9km of forested switchbacks, but has a huge payoff at the end. But from there, the rest of the trails in the park are breath-taking from start to finish!
There’s a few different ways to hike Garibaldi Park as a long weekend trip. I’ve done two long weekend trips to Garibaldi Lake and both times I left work a little early on Friday afternoon and hiked the 9km up to the lake on Friday night. From there, I stayed two nights at the lake and did day hikes on Saturday and Sunday, before hiking back out on Monday. However, if you’re a beginner I would recommend hiking up on Saturday morning instead and just doing one day hike on Sunday. Both times I hiked in Friday night, I started hiking around 5:30pm and got to the lake around dusk. If you’re a new hiker or not comfortable hiking or setting up in the dark, start your hike on Saturday morning instead.
Once you get to Garibaldi Lake though, there’s lots of options for day hikes. Panorama Ridge is my personal favourite and Black Tusk is also very popular. There’s also the lesser known Mount Price, which leaves the lake in the opposite direction of the other two hikes. Panorama and Black Tusk are both very popular and well marked trails, Mount Price is a bit more of a bush wack at times and isn’t well marked. So stick to the well marked trails if you aren’t familiar with way-finding.
However, if you’re making Garibaldi your destination for the long weekend, you’ll have to plan in advance. You must book a backcountry permit in advance for $10 per person, per night. The campsites release 4 months in advance of the date you book and they do book up fast. There is overflow camping at Taylor Meadows campsite, but it’s 1.5km away from the lake and definitely not as nice as the Garibaldi campsite. And as a final reminder, Garibaldi has been having problems with littering, so If you visit Garibaldi, make sure to pack out all of your garbage and leave no trace that you were there.
For the Through Hiker: Heather Trail
Trail profile: Day 1 (13.5km, 300m gain), Day 2 (9km, no gain), Day 3 (17.5km, 1000m loss)
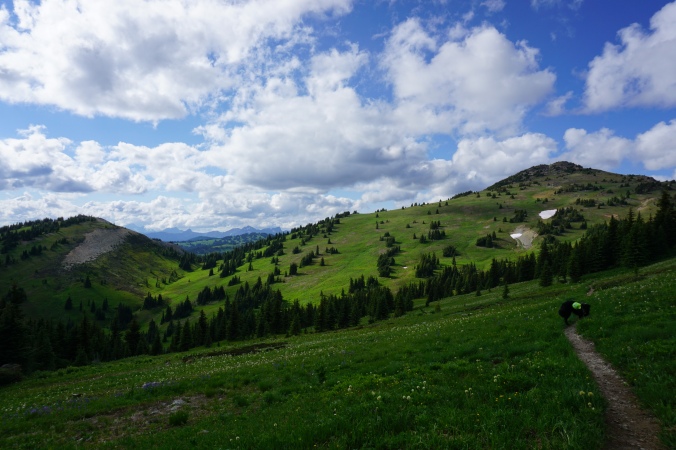
Personally, I’m a big fan of through hiking. It’s great when you only have to set up camp once and don’t have to carry your heavy pack with you every day, but there’s something really fulfilling about through hiking and ending at a different location from where you started. It requires a bit more coordination as you’ll often need 2 vehicles, but it’s fun not to have to retrace your steps at any point.
Through hikes often require more time than just a long weekend, but one hike that can be done over 2 nights that I absolutely loved was the Heather Trail in Manning Park (it can also be done as a return hike, but I think it works best as a through hike). Manning Park is my favourite provincial park in southwestern BC and has some of the most scenic hikes. The Heather Trail is particularly well known for its wildflowers as the trail is mostly comprised of alpine meadows that burst into bloom in late July. The other highlights of the trail include walking the ridge along first brother mountain and camping at Nicomen Lake.
On Day 1, drive out to Manning Park and hike 13km to Kicking Horse Campsite. There is another camp called Buckthorn Campsite located at 5km, but it’s an easy walk to Buckthorn and not a scenic camp, so I’d recommend pushing all the way to Kicking Horse on the first day. Along the way, do the 1km summit up First Brother Mountain. On Day 2, it’s a more relaxing 9km hike to Nicomen Lake through meadow after meadow. Nicomen Lake is great for fishing if you’re so inclined, but bring your bug net because there’s a lot of flies. Nicomen Lake technically marks the end of the Heather Trail, but instead of turning around and hiking back 21km, I’d recommend hiking the Nicomen Lake Trail 17km back to the highway. 17km sounds like a lot, but the entire trail is downhill and we did it in just 5 hours. The benefit of hiking the trail this way is that there’s limited elevation gain. The hike starts at Blackwell Road, which is located 1000 metres up from the highway, so you do most of the elevation on the drive up. There’s no reservation system for this hike, but you do need a backcountry permit, which costs $5 per person, per night.
For the Long Distance Hiker: Elfin Lakes
Trail profile: Day 1 (11km, 600m gain), Day 2 (13-22km, 350-600m gain), Day 3 (11km, 600m loss)
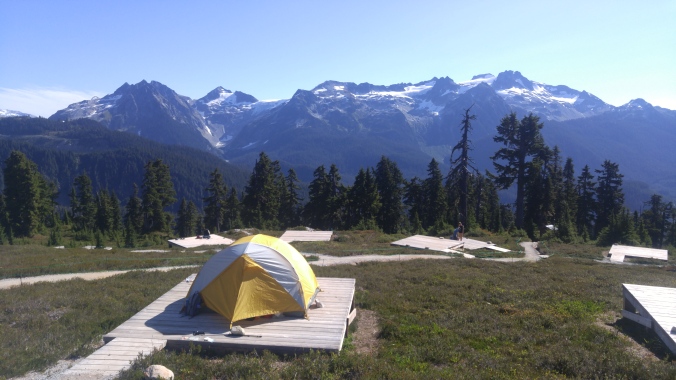
I’m sensing a theme with this list because Elfin Lakes is another trail I’ve done 3 times! But my favourite was a 3 day trip that I did over the Labour Day long weekend in early September. Elfin Lakes is also located in Garibaldi Park and while it also gets a lot of visitors, it feels a lot less overwhelming than Garibaldi Lake. There’s a hut and tent pads at Elfin Lakes and you will have a similar problem as Garibaldi Lake in that you will need to book your reservation early if you want to be assured a site. The hut books up really fast in the winter and the tent pads book up really fast in the summer.
I say Elfin Lakes feels less overwhelming though because the campsite is much more wide open than Garibaldi and there’s a lot more area for people to disburse during the day, so it doesn’t feel quite as busy. You can swim in both lakes, but the Elfin Lakes are WAY smaller than Garibaldi Lake and therefore, much warmer and enjoyable for swimming. If it’s clear, you can also get an amazing view of the stars at night. My suggestion for Elfin Lakes would be to hike the 11km to the Lake on Day 1, then do a day hike to either Opal Cone or Mamquam Lake on Day 2, and hike out again on Day 3.
I call it the long distance hike because the options for your Day 2 hike are definitely nothing to scoff at. Opal Cone is a 13km round trip from the lakes, with about 350m in elevation gain and Mamquam Lake is a 22km round trip with 600m in elevation gain. I did the trip with my friend Brandon and we tried to get to Mamquam Lake on Day 2, but it was insanely hot and there’s a lot of elevation variation, so we never made it the whole way to Mamquam. We ended up turning back around 8km in, making for 16km in total. But the good news is, Opal Cone and Mamquam are the same trail, so even though we didn’t make it to Mamquam, we still got to do Opal Cone. There’s a lot of ground to cover on this hike, but with the exception of the first 5km from the parking lot, the entire hike is incredibly scenic!
For the Photographer: Skyline II Trail
Trail profile: Day 1 (12.5km, 610m gain), Day 2 (14km, minimal gain), Day 3 (12.5km, 610m loss)
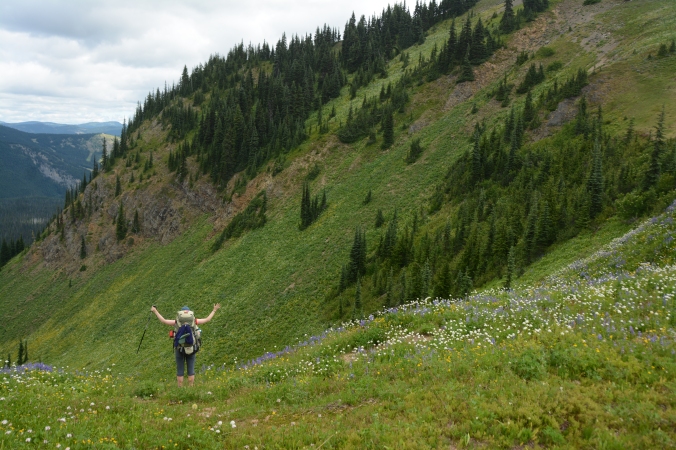
Finally, the last hike on the list is not only my favourite hike on the list, but my favourite hike of all time! Like I said, I love Manning Park and for me, the Skyline Trail is the highlight of the park. It’s the most scenic hike I’ve ever done and it’s not even that crowded. Granted I didn’t do it on a long weekend, I took a Friday off to make it my own long weekend, so it might be busier on an actual long weekend. But that said, I did the same thing for the Heather Trail and it was definitely a lot busier.
I also hiked Skyline in peak wildflower season, which may have contributed to my love of the trail, but either way, I think I would have loved this trail because it has so many incredible views. The entire Skyline II Trail is 25km long and can be hiked with as a through hike or a return hike. The trail runs from Manning Park to Skagit Park, with Mowich camp smack-dab in the middle at 12.5km. I did the trail as a return hike from the Manning Side because the 2 trailheads are a 2 hour drive apart, so it’s logistically challenging (but not impossible) to coordinate. My recommendation is to start on the Manning side and hike to Mowich Camp on Day 1. From there, you can day hike along the Hozameen Ridge trail on Day 2, which branches off the main trail and continues towards Hozameen Mountain and the border.
Hozameen mountain is a very distinctive mountain and you’ll be staring at it all of Day 1, so it felt great to hike to the base of it. The trail continues on for a long time and actually ends on the American side of Skagit Valley. A good target for your day hike is to hike 7km to the Border monument. There’s a distinctive peak at the end of the ridge where you could end (because it is a steep downhill to the border monument), but I really wanted to see the monument, so we pushed through the last 500m to reach the monument – but the peak at the end of the ridge is a great place for lunch! We returned to Mowich Camp to sleep and then hiked back out the way we came on Day 3. But since the distance is the same on both sides of the Skyline Trail, you could hike out to the Skagit side instead if you wanted to make it a through hike. I’ve heard the Skagit side isn’t as scenic though and is mostly in the trees, so I didn’t mind hiking back along the same trail. The backcountry permit for this trail is the same as Heather Trail – no advance booking required, but the permit is $5 per day, per person.
Great list! I’ve yet to get to Manning and I’m very excited given your descriptions.
Manning is my fav provincial park! So much to explore there, though the weather can be a bit hit or miss. It’s also great for snowshoeing!