Real talk – you can die in the wilderness.
There are so many things that can happen to you when you go on an adventure outdoors. Everything from becoming injured to becoming lost. If this happens, you want to make sure you give yourself the best chance at being found and at surviving an extended period of time in the outdoors. That’s why it’s so essential to be prepared every time you go outside. Even routine day hikes can go awry and you don’t want to find yourself in a tight spot. I’d argue that day hikes have the potential to be the most dangerous as you’re more likely to have less gear with you.
So when are you most vulnerable? When you’re a beginner and when you become complacent. I’ve spent a lot of time in the last few years educating myself on being prepared, but I feel lucky nothing bad ever happened to me when I first started hiking because I just naturally knew less and didn’t understand how to really be prepared. It’s hard to be prepared when you don’t understand the risks. Search and Rescue tasks have been way up because with the pandemic, more people are looking to enjoy nature than ever before. While it’s great that more people are getting outside, it’s also super important to get educated.
But it’s not just beginners who are at risk. Those who are experienced, but become complacent in their safety, are just as much at risk. It’s still easy to take a wrong turn on the trail or find yourself hiking in the dark as you get more confident in your abilities. I’ve noticed with some of my friends, there’s a tendency to bring less stuff on hikes in an effort to lighten packs and move faster. That’s great when everything goes as planned, but you don’t want to find yourself in a situation where you left something at home that you shouldn’t have.
So whether you’re a beginner or experienced, what should you do to be prepared for a trip into the backcountry?
Create a Trip Plan
In my opinion, creating a trip plan is one of the most important things you must do. Make sure you research where you are going and outline what you expect the trip to look like. In your research of the trail or camp, you should take into consideration:
- Seasonal conditions (will all the snow be melted? is there avalanche risk?)
- Weather conditions (is there rain in the forecast? will it be cold?)
- Daylight hours (how long will it take? will I be hiking in the dark?)
- Ability (how long is the hike? how much elevation gain?)
- Special equipment (will I need microspikes? beacon, probe, or shovel?)
- Emergency contact (does someone know where I’m going and when I’ll return?)
Having an emergency contact who knows your trip plan is so important. If you become lost, this individual will be able to alert search and rescue quickly and advise them on where to look for you. There’s a lot of other information that can be helpful in assisting search and rescue. Leave a trip plan at BC Adventure Smart, or leave the following information with your contact:
- Where you’ll be hiking, the route you’ll be taking, and when you’ll check in
- What equipment you have with you
- Identifying features of your equipment, such as jacket colour, tent brand, and hiking boots
- Any other important medical information
10 Essentials
When I first started learning about the essentials, I thought it sounded like a lot of stuff and that it was impossible to bring everything with me on every hike. I’ve since learned that a lot of the essentials don’t actually take up that much space and many are things you would intuitively bring with you anyways.
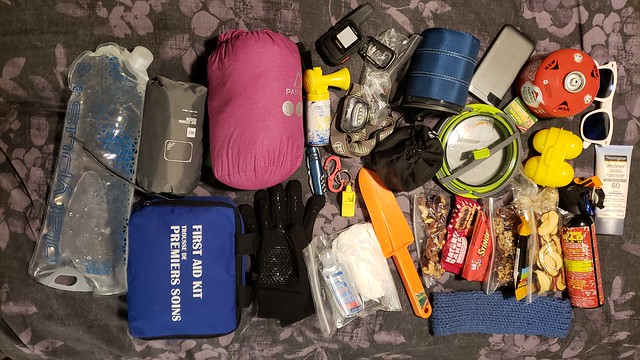
For example, even as a beginner I knew it was important to bring extra food and water (#1) in case the hike took longer than expected or was super challenging, and extra clothes (#2) in case it was cold at the top. What I’ve learned over the years is to always bring more water than I think I’ll need and I always bring a pack of water tabs with me as a back up (though these won’t help you on a dry hike). I also learned that your warm clothes should be more than just an extra sweater. Bring a hat and gloves, socks, a rain jacket, and warm layers made of wicking fabrics such as wool, fleece, or poly.
Other essentials that are pretty intuitive and don’t take up much space include a pocketknife or multi-tool (#3), a signaling device (#4) such as a whistle, mirror, or flare, and a headlamp or flashlight (#5). Even though it’s small, a headlamp seems to be something a lot of people leave at home. I think people just plan to use their phone flashlight if they need a light, but remember, you’ll likely be taking pictures on your phone or using it for navigation, which can run out the battery, and it may become a lifeline for you if you get lost. A head lamp enables you to be hands-free, making a dark descent safer. I recommend throwing in an extra set of batteries with your headlamp as well, just in case.
A first aid kit (#6) is also intuitive for most people, yet many hike without it. I have a pretty sizable first aid kit that I carry with me whenever I go out, but there are lots of pocket sized kits available at MEC, canadian tire, walmart, etc. Ideally everyone should have their own small kit in case they get separated and at least one person should have a more substantial kit. Some important things to carry in your kit include band-aids, blister care, dressings, gloves, medical tape, scissors, sam splint, and gauze or tensile bandage. I also like to bring polysporin, wet wipes, tweezers, electrolyte powder, and some medications (peptobismal, advil).
Essentials that can be less intuitive to bring on every day hikes include a firestarter (#7) – I bring a ziploc with waterproof matches and 2 small firestarters – and shelter (#8). I think shelter is one people could get hung up on because it sounds like you should bring a tent, but it’s really as simple as bringing an emergency blanket with you. North Shore Search and Rescue recommend pairing a bivvy sack with your thermal blanket. I keep both in my first aid kit so that I never forget them.
I want to spend a bit of time talking about the last two essentials; navigation (#9) and communication (#10), because it’s something I’ve given a lot of thought to over the past year. Also, please note, depending on the activity, your essentials list may need to expand to include other specialized gear such as PFD and spare paddle if you’re boating; transceiver, probe, and shovel if you’re in avalanche terrain; or ropes and harness if you’re climbing (as examples).
Navigation
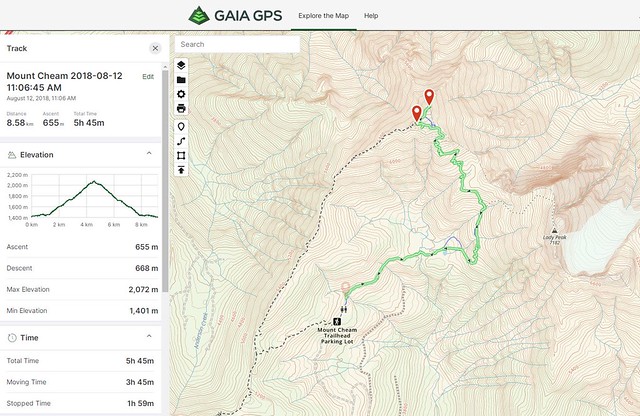
Most people use a cell phone for navigation and communication, myself included until the past year. Options for navigation range from a map and compass, to your phone, to a GPS. Having a map is important because it will set you up for success from the beginning. It’s good to check the map in advance to identify any areas where the trail branches so you can be sure to take the right fork. Maps can become less useful if you become lost and don’t know where you are on the map (unless you’re good at identifying topography, which I still think is an important skill), which is where a GPS can become more useful.
With a GPS, you can track your steps from the very beginning, leaving a digital trail for yourself to follow back if you become lost. The good news is, you don’t really need a dedicated GPS for this and there are lots of great apps you can use directly on your phone. I don’t personally have a GPS and always use my phone, there’s just a few things you need to do in advance to make sure it will work for you in the field.
If you’re relying on a GPS app, make sure to download the map offline before your adventure and to turn on location services. A lot of maps load from the network and you don’t want to find yourself without navigation because you forgot to pre-load the map. You also want to make sure your battery is going to last if you’re using your phone (especially if you’re also relying on your phone for communication). Make sure you have full battery before you leave and bring a power bank with you. There’s lots of trail apps out there, I personally like the GaiaGPS app. Just be aware that the trails on many apps are based on user data – just because you see a trail on the map doesn’t mean it’s safe; some trails may pass through climbing routes or only be used for winter travel, so you still need to do your research.
Communication
Communication is probably one of the hardest parts of emergency preparedness. It’s expensive to purchase satellite devices, so understandably a lot of people rely on their phones or the fact that they’re hiking in a group and have left a trip plan. The obvious problem with relying on a cell phone is that you may not always have service. If you only hike near cities with good cell service, then it’s probably fine – just make sure you know how to get your GPS coordinates off of your phone in the event you need to be rescued.
If a cell phone is your only communication device and you’re not sure if you’ll have service, then hiking in a group and leaving a trip plan with someone you trust can reduce your risk. By hiking in a group, it’s easier to manage injuries on the trail because it’s usually possible for one of your hiking mates to provide first aid or to turn back for help. It won’t be great if you have an emergency that requires a quick extraction, but at least one of your fellow hikers should be able to go for help faster than having to wait for your emergency contact to raise the alarm when you don’t check in. And in a scenario where your whole group gets lost, you still have the safeguard of your emergency contact to send Search and Rescue to look for you.
However, if you’re going to be spending any extended time in the wilderness – where help or your check in time with your emergency contact are more than a day away – then you should really either buy or rent a reliable satellite communication device for the trip. They are expensive, but it could literally save your life.
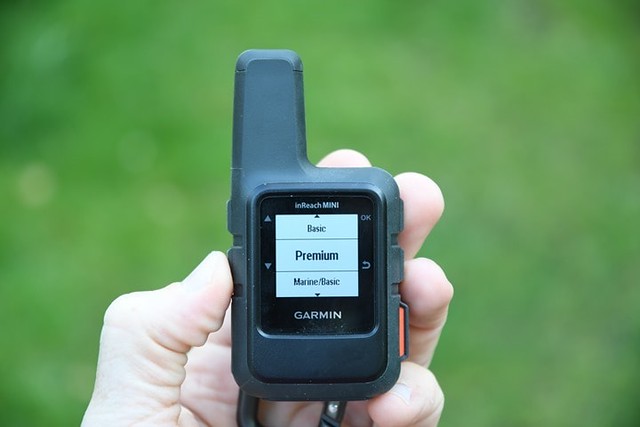
I’m not an expert on satellite devices, so you’ll definitely want to do your own research. Options range from the SPOT, to the InReach, to a personal locator beacon. I recently purchased an InReach Mini from Garmin that I’ve been very happy with. The InReach is more expensive to buy upfront, and costs ~$15-25 a month for a basic subscription. If you won’t actually be using the device that much, you can suspend your subscription for months at a time, which is a nice feature. SPOT has a cheaper upfront cost, but I understand the annual subscription can get pricey and I haven’t heard very good things about their customer service.
The main difference between the two is that SPOT is a one way communication device, so most likely you’ll only be using it to notify your emergency contact to how the trip is going, or to activate the SOS function for emergency rescue. The InReach is a two-way communication device that works like SMS. It has the SOS function as well, but you can also send and receive texts to anyone with a cell phone or email address. Both are great if you find yourself running a day behind schedule or you have a non life-threatening injury, because you can notify your emergency contact. However, my InReach saved us a lot of grief this summer when Brandon’s car broke down on the forestry road to Cape Scott, because after hitching a ride back into town, I was still able to communicate with the group stuck on the forestry road. Plus in an emergency, it’s reassuring to get an immediate response back when you activate SOS, being able to communicate with you enables rescuers to be more prepared for your situation.
Grow Your Knowledge
That pretty much concludes this blog post – I just wanted to note that while the internet is a great resource, there are lots of hands-on ways to grow your skills as well. There are lots of organizations that offer group hikes focused on skill development and I’ve seen a lot of webinars popping up with safety and skills based workshops. Red Cross offers several first aid courses – I don’t recommend their emergency first aid course as it’s too basic, but I’ve done both their standard and wilderness first aid courses, which are excellent. If you spend a lot of time skiing or snowshoeing, I’d also recommend taking Avalanche Safety Training, or if you canoe or kayak, to take the respective training course from Paddle Canada.
Finally, check out the new docu-series on North Shore Search and Rescue, which you can stream for free on Knowledge Network. North Shore is the busiest S&R in Canada and the documentary does an excellent job showcasing the work that they do and the importance of being prepared in the backcountry. Happy adventures everyone!


Pingback: Snowshoe Guide to the North Shore | The Road Goes Ever On
Pingback: Let’s Talk: Winter Camping | The Road Goes Ever On
Pingback: 18 Scenic and Easy Hikes in Southwestern BC | The Road Goes Ever On
Pingback: Elsay Lake Backpacking Trip | The Road Goes Ever On
Pingback: Mount Assiniboine Backpacking Trip: Part II | The Road Goes Ever On
Pingback: Hiking Frosty Mountain | The Road Goes Ever On
Pingback: Let’s Talk: First Aid | The Road Goes Ever On